Supply Cart: Difference between revisions
CptTwinkie (talk | contribs) mNo edit summary |
CptTwinkie (talk | contribs) mNo edit summary |
||
| Line 1: | Line 1: | ||
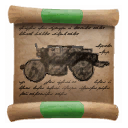
{{SEO|image_url= | {{SEO|image_url=https://mec-wiki-media.storage.googleapis.com/images/a/aa/SimpleCartMil.png|description=A set of drawings that shows how to assemble a basic supply cart.}} | ||
{{Thumbnail|SimpleCartMil.png|Supply Cart}} | {{Thumbnail|SimpleCartMil.png|Supply Cart}} | ||
<i>"A set of drawings that shows how to assemble a basic supply cart. | <i>"A set of drawings that shows how to assemble a basic supply cart. | ||
| Line 6: | Line 6: | ||
{{Version <!-- Do not change the version until the entire page is up-to-date --> | {{Version <!-- Do not change the version until the entire page is up-to-date --> | ||
|release=0|major= | |release=0|major=7|minor=X}} | ||
{{HistoryId|0.6|15284}} | {{HistoryId|0.6.4|16510|0.6|15284}} | ||
<!-- Start exported template data. Please do not edit this section --> | <!-- Start exported template data. Please do not edit this section --> | ||
| Line 17: | Line 17: | ||
{{Table-Cell|}} | {{Table-Cell|}} | ||
{{Table-End}} | {{Table-End}} | ||
|tag= | |tag=Research | ||
Research | |||
|branch=military | |branch=military | ||
|unlocks= | |unlocks= | ||
{{Image_Link| | {{Image_Link|SimpleCart.png|Schematic: Supply Cart}}<br/> | ||
{{Image_Link|SimpleCart.png|Schematic: Transportation}} | |||
}} | }} | ||
| Line 28: | Line 27: | ||
===Step 1=== | ===Step 1=== | ||
Sometimes you need some storage while you're on the go. Start by crafting the needed resources. | Sometimes you need some storage while you're on the go. Start by crafting the needed resources. | ||
: • Obtain | : • Obtain 26x Timber (0/26) | ||
: • Obtain 4x Round Timber (0/4) | : • Obtain 4x Round Timber (0/4) | ||
| Line 37: | Line 36: | ||
===Step 3=== | ===Step 3=== | ||
Place a Timber | Place a Timber vertically into ground to hold up the cart while you work on it. | ||
Then place another Timber | Then place another Timber horizontally on the side of the first timber to make a T shape. | ||
You may need to adjust the placement distance of the timber to place it properly. Use "Ctrl + {{Key|wheel}}" to adjust the maximum distance. | |||
: • Place 2x Timber (0/2) | : • Place 2x Timber (0/2) | ||
[[File:MilitarySimpleCart_01.png]] | [[File:MilitarySimpleCart_01.png]] | ||
===Step 4=== | ===Step 4=== | ||
Add two Timber 5s to the horizontal Timber | Add two Timber 5s to the horizontal Timber. This should make a wide U shape. | ||
See the example image in the quest journal ("{{Key|j}}"). | See the example image in the quest journal ("{{Key|j}}"). | ||
: • Place 2x Timber 5 (0/2) | : • Place 2x Timber 5 (0/2) | ||
| Line 75: | Line 75: | ||
See the example image in the quest journal ("{{Key|j}}"). | See the example image in the quest journal ("{{Key|j}}"). | ||
You can push the cart to move it or you can pull it with your rope tool. To use your rope tool, empty your hands by pressing {{Key|0}}. Then aim at the cart and use the {{Key|rmb}} to attach the rope. | You can push the cart to move it or you can pull it with your rope tool. To use your rope tool, empty your hands by pressing "{{Key|0}}". Then aim at the cart and use the "{{Key|rmb}}" to attach the rope. | ||
When you pull the rope it will turn from green to yellow and finally red. If you continue pulling harder the rope will break free. If you are careful about how you use the rope, it can pull very heavy objects. | When you pull the rope it will turn from green to yellow and finally red. If you continue pulling harder the rope will break free. If you are careful about how you use the rope, it can pull very heavy objects. | ||
: • Place 4x Small Chest (0/4) | : • Place 4x Small Chest (0/4) | ||
[[File:MilitarySimpleCart_06.png]] | [[File:MilitarySimpleCart_06.png]] | ||
<!-- End exported template data --> | <!-- End exported template data --> | ||
Latest revision as of 18:06, 18 July 2022

"A set of drawings that shows how to assemble a basic supply cart.
You'll have no trouble moving additional supplies to your fortress with this regulation cargo cart design."
| Version: | 0.7 |
| History: | 0.6.4 → 0.6 |
Quest Information
Quests Required to Unlock This Quest
Type of Quest
Research Branch
Items Unlocked
 Schematic: Supply Cart
Schematic: Transportation
Quest Steps
Step 1
Sometimes you need some storage while you're on the go. Start by crafting the needed resources.
- • Obtain 26x Timber (0/26)
- • Obtain 4x Round Timber (0/4)
Step 2
Here are the blocks you'll need to build a simple supply cart.
- Craft or obtain 4 catch blocks
- Craft or obtain 4 wheels
Step 3
Place a Timber vertically into ground to hold up the cart while you work on it. Then place another Timber horizontally on the side of the first timber to make a T shape.
You may need to adjust the placement distance of the timber to place it properly. Use "Ctrl + ![]() " to adjust the maximum distance.
" to adjust the maximum distance.
- • Place 2x Timber (0/2)

Step 4
Add two Timber 5s to the horizontal Timber. This should make a wide U shape.
See the example image in the quest journal ("![]() ").
").
- • Place 2x Timber 5 (0/2)

Step 5
Add a Timber 8 to close the rectangle.
See the example image in the quest journal ("![]() ").
").
- • Place 1x Timber 8 (0/1)

Step 6
The rectangular chassis is done but it still needs wheels. Place catch blocks on the front and back corners to attach the wheels.
See the example image in the quest journal ("![]() ").
").
- • Place 4x Catch Block (0/4)

Step 7
Add a wheel to the outside of each catch block. Rotate the wheels so that the braces face toward the cart.
See the example image in the quest journal ("![]() ").
").
- • Place 4x Wheel (0/4)

Step 8
Now that the chassis is ready to roll you'll want to add some small chests for cargo.
- • Craft 4x Small Chest (0/4)
Step 9
Place the 4 chests inside the cart to finish it.
See the example image in the quest journal ("![]() ").
").
You can push the cart to move it or you can pull it with your rope tool. To use your rope tool, empty your hands by pressing "![]() ". Then aim at the cart and use the "
". Then aim at the cart and use the "![]() " to attach the rope.
When you pull the rope it will turn from green to yellow and finally red. If you continue pulling harder the rope will break free. If you are careful about how you use the rope, it can pull very heavy objects.
" to attach the rope.
When you pull the rope it will turn from green to yellow and finally red. If you continue pulling harder the rope will break free. If you are careful about how you use the rope, it can pull very heavy objects.
- • Place 4x Small Chest (0/4)
