Wooden Sticks: Difference between revisions
Jump to navigation
Jump to search
CptTwinkie (talk | contribs) mNo edit summary |
CptTwinkie (talk | contribs) m (Added missing images) |
||
| Line 4: | Line 4: | ||
usedtocreate= | usedtocreate= | ||
{{Table-Start}} | {{Table-Start}} | ||
{{Table-ImageCell| | {{Table-ImageCell|AngleStairsLeftSpiral.png|Angle Stairs, Left Spiral}} | ||
{{Table-ImageCell| | {{Table-ImageCell|StairsSharp.png|Angle Stairs, Right Spiral}} | ||
{{Table-ImageCell| | {{Table-ImageCell|StoneBlockSlopeCorner.png|Angled Slope-Corner}} | ||
{{Table-AddRow}} | {{Table-AddRow}} | ||
{{Table-ImageCell|No.png|Arch Inner Corner Angled}} | {{Table-ImageCell|No.png|Arch Inner Corner Angled}} | ||
| Line 12: | Line 12: | ||
{{Table-ImageCell|No.png|Arch Outer Corner}} | {{Table-ImageCell|No.png|Arch Outer Corner}} | ||
{{Table-AddRow}} | {{Table-AddRow}} | ||
{{Table-ImageCell| | {{Table-ImageCell|StoneCeilingStraight.png|Arch}} | ||
{{Table-ImageCell| | {{Table-ImageCell|BannerWorkstation.png|Banner Workstation}} | ||
{{Table-ImageCell| | {{Table-ImageCell|BattlementStoneStraight.png|Battlement}} | ||
{{Table-AddRow}} | {{Table-AddRow}} | ||
{{Table-ImageCell|No.png|Claim Block}} | {{Table-ImageCell|No.png|Claim Block}} | ||
{{Table-ImageCell| | {{Table-ImageCell|BattlementStoneCorner.png|Corner Battlement}} | ||
{{Table-ImageCell| | {{Table-ImageCell|StoneBattlementSideDiagonal.png|Diagonal Battlement}} | ||
{{Table-AddRow}} | {{Table-AddRow}} | ||
{{Table-ImageCell| | {{Table-ImageCell|StoneBattlementCenterDiagonal.png|Diagonal Ledge Battlement}} | ||
{{Table-ImageCell| | {{Table-ImageCell|DiagonalLedgePlatform.png|Diagonal Ledge Platform}} | ||
{{Table-ImageCell| | {{Table-ImageCell|DiagonalSlopeCorner.png|Diagonal Slope-Corner}} | ||
{{Table-AddRow}} | {{Table-AddRow}} | ||
{{Table-ImageCell|DiagonalStairsSlopeCorner.png|Diagonal Stairs Slope-Corner}} | {{Table-ImageCell|DiagonalStairsSlopeCorner.png|Diagonal Stairs Slope-Corner}} | ||
| Line 29: | Line 29: | ||
{{Table-AddRow}} | {{Table-AddRow}} | ||
{{Table-ImageCell|No.png|Interior Round Floor}} | {{Table-ImageCell|No.png|Interior Round Floor}} | ||
{{Table-ImageCell| | {{Table-ImageCell|StoneBattlementRoundLargeSide.png|Large Round Battlement}} | ||
{{Table-ImageCell| | {{Table-ImageCell|HouseTimberFloorLargeRound.png|Large Round Floor}} | ||
{{Table-AddRow}} | {{Table-AddRow}} | ||
{{Table-ImageCell| | {{Table-ImageCell|StoneBattlementRoundLargeCenter.png|Large Round Ledge Battlement}} | ||
{{Table-ImageCell| | {{Table-ImageCell|LargeRoundLedgePlatform.png|Large Round Ledge Platform}} | ||
{{Table-ImageCell| | {{Table-ImageCell|PalisadeLargeRoundTopBattlement.png|Large Round Palisade Battlement}} | ||
{{Table-AddRow}} | {{Table-AddRow}} | ||
{{Table-ImageCell| | {{Table-ImageCell|PalisadeLargeRoundTop.png|Large Round Palisade Spikes}} | ||
{{Table-ImageCell| | {{Table-ImageCell|PalisadeLargeRound.png|Large Round Palisade}} | ||
{{Table-ImageCell| | {{Table-ImageCell|RoofTileLargeRound.png|Large Round Tile Roof}} | ||
{{Table-AddRow}} | {{Table-AddRow}} | ||
{{Table-ImageCell|LargeRoundWallRoundDoubleDoor.png|Large Round Wall, Double Doors}} | {{Table-ImageCell|LargeRoundWallRoundDoubleDoor.png|Large Round Wall, Double Doors}} | ||
| Line 44: | Line 44: | ||
{{Table-ImageCell|No.png|Large Round Wall, Double Shutters}} | {{Table-ImageCell|No.png|Large Round Wall, Double Shutters}} | ||
{{Table-AddRow}} | {{Table-AddRow}} | ||
{{Table-ImageCell| | {{Table-ImageCell|LargeRoundWallDoubleWindow.png|Large Round Wall, Double Windows}} | ||
{{Table-ImageCell|LargeRoundWallRoundLeftDoorOffset.png|Large Round Wall, Left Door Offset}} | {{Table-ImageCell|LargeRoundWallRoundLeftDoorOffset.png|Large Round Wall, Left Door Offset}} | ||
{{Table-ImageCell|LargeRoundWallRoundLeftDoor.png|Large Round Wall, Left Door}} | {{Table-ImageCell|LargeRoundWallRoundLeftDoor.png|Large Round Wall, Left Door}} | ||
{{Table-AddRow}} | {{Table-AddRow}} | ||
{{Table-ImageCell|LargeRoundWallRightDoorOffset.png|Large Round Wall, Left Entrance Offset}} | {{Table-ImageCell|LargeRoundWallRightDoorOffset.png|Large Round Wall, Left Entrance Offset}} | ||
{{Table-ImageCell|LargeRoundWallRightDoorOffset.png|Large Round Wall, Right Entrance Offset}} | |||
{{Table-ImageCell|StoneWallRoundLargeDoor.png|Large Round Wall, Left Entrance}} | {{Table-ImageCell|StoneWallRoundLargeDoor.png|Large Round Wall, Left Entrance}} | ||
{{Table-AddRow}} | |||
{{Table-ImageCell|No.png|Large Round Wall, Left Shutters}} | {{Table-ImageCell|No.png|Large Round Wall, Left Shutters}} | ||
{{Table-ImageCell|LargeRoundWallRightWindow.png|Large Round Wall, Left Window}} | |||
{{Table-ImageCell|LargeRoundWallRoundRightDoor.png|Large Round Wall, Right Door}} | |||
{{Table-AddRow}} | {{Table-AddRow}} | ||
{{Table-ImageCell|LargeRoundWallLeftDoor.png|Large Round Wall, Right Entrance}} | {{Table-ImageCell|LargeRoundWallLeftDoor.png|Large Round Wall, Right Entrance}} | ||
{{Table-ImageCell|No.png|Large Round Wall, Right Shutters}} | {{Table-ImageCell|No.png|Large Round Wall, Right Shutters}} | ||
{{Table-ImageCell| | {{Table-ImageCell|StoneWallRoundLargeWindow.png|Large Round Wall, Right Window}} | ||
{{Table-AddRow}} | {{Table-AddRow}} | ||
{{Table-ImageCell| | {{Table-ImageCell|WalkWayLargeRound.png|Large Round Wall-Walk}} | ||
{{Table-ImageCell|StoneWallRoundLarge.png|Large Round Wall}} | |||
{{Table-ImageCell|No.png|Large Slope, Double Battlement}} | {{Table-ImageCell|No.png|Large Slope, Double Battlement}} | ||
{{Table-AddRow}} | |||
{{Table-ImageCell|No.png|Large Slope, Left Battlement}} | {{Table-ImageCell|No.png|Large Slope, Left Battlement}} | ||
{{Table-ImageCell|No.png|Large Slope, Right Battlement}} | |||
{{Table-ImageCell|LargeSlope.png|Large Slope}} | |||
{{Table-AddRow}} | {{Table-AddRow}} | ||
{{Table-ImageCell|No.png|Large Vertical Slope}} | {{Table-ImageCell|No.png|Large Vertical Slope}} | ||
{{Table-ImageCell|StoneWallDoorCenter.png|Large Wall With Entrance}} | {{Table-ImageCell|StoneWallDoorCenter.png|Large Wall With Entrance}} | ||
{{Table-ImageCell|StoneWallWindowCenter.png|Large Wall With Window}} | {{Table-ImageCell|StoneWallWindowCenter.png|Large Wall With Window}} | ||
{{Table-AddRow}} | {{Table-AddRow}} | ||
{{Table-ImageCell| | {{Table-ImageCell|LedgeBattlementInsideCorner.png|Ledge Battlement, Inside Corner}} | ||
{{Table-ImageCell| | {{Table-ImageCell|LedgeBattlementOutsideCorner.png|Ledge Battlement, Outside Corner}} | ||
{{Table-ImageCell| | {{Table-ImageCell|BattlementStoneStraightCenter.png|Ledge Battlement}} | ||
{{Table-AddRow}} | {{Table-AddRow}} | ||
{{Table-ImageCell| | {{Table-ImageCell|LedgePlatformInsideCorner.png|Ledge Platform, Inside Corner}} | ||
{{Table-ImageCell| | {{Table-ImageCell|LedgePlatformOutsideCorner.png|Ledge Platform, Outside Corner}} | ||
{{Table-ImageCell| | {{Table-ImageCell|LedgePlatform.png|Ledge Platform}} | ||
{{Table-AddRow}} | {{Table-AddRow}} | ||
{{Table-ImageCell| | {{Table-ImageCell|PalisadeStraightTopBattlement.png|Palisade Battlement}} | ||
{{Table-ImageCell| | {{Table-ImageCell|PalisadeDiagonalTopBattlement.png|Palisade Diagonal Battlement}} | ||
{{Table-ImageCell| | {{Table-ImageCell|PalisadeDiagonalTop.png|Palisade Diagonal Spikes}} | ||
{{Table-AddRow}} | {{Table-AddRow}} | ||
{{Table-ImageCell| | {{Table-ImageCell|PalisadeDiagonal.png|Palisade Diagonal}} | ||
{{Table-ImageCell| | {{Table-ImageCell|PalisadeGate.png|Palisade Gate}} | ||
{{Table-ImageCell| | {{Table-ImageCell|PalisadeStraightTop.png|Palisade Spikes}} | ||
{{Table-AddRow}} | {{Table-AddRow}} | ||
{{Table-ImageCell|PalisadeStraight.png|Palisade}} | |||
{{Table-ImageCell|No.png|Railing}} | {{Table-ImageCell|No.png|Railing}} | ||
{{Table-ImageCell| | {{Table-ImageCell|RoofBattlementLeft.png|Roof Battlement, Left}} | ||
{{Table-AddRow}} | {{Table-AddRow}} | ||
{{Table-ImageCell|RoofBattlementRight.png|Roof Battlement, Right}} | |||
{{Table-ImageCell|No.png|Round Interior Entrace, Left}} | {{Table-ImageCell|No.png|Round Interior Entrace, Left}} | ||
{{Table-ImageCell|No.png|Round Interior Entrace, Right}} | {{Table-ImageCell|No.png|Round Interior Entrace, Right}} | ||
{{Table-AddRow}} | |||
{{Table-ImageCell|No.png|Round Interior With Door, Left}} | {{Table-ImageCell|No.png|Round Interior With Door, Left}} | ||
{{Table-ImageCell|No.png|Round Interior With Door, Right}} | {{Table-ImageCell|No.png|Round Interior With Door, Right}} | ||
{{Table-ImageCell| | {{Table-ImageCell|HouseStoneRoundIn.png|Round Interior}} | ||
{{Table-AddRow}} | {{Table-AddRow}} | ||
{{Table-ImageCell|RoundSlopeCorner.png|Round Slope-Corner}} | |||
{{Table-ImageCell|StoneBlockStairsCorner.png|Round Stairs Slope-Corner}} | {{Table-ImageCell|StoneBlockStairsCorner.png|Round Stairs Slope-Corner}} | ||
{{Table-ImageCell| | {{Table-ImageCell|RoofTileCornerRound.png|Round Tile Roof Corner}} | ||
{{Table-AddRow}} | |||
{{Table-ImageCell|WoodShutterRound.png|Round Wall With Shutters}} | {{Table-ImageCell|WoodShutterRound.png|Round Wall With Shutters}} | ||
{{Table-ImageCell|StoneRoundedWindow.png|Round Wall With Window}} | {{Table-ImageCell|StoneRoundedWindow.png|Round Wall With Window}} | ||
{{Table-ImageCell|No.png|Round Wall, Left Door}} | {{Table-ImageCell|No.png|Round Wall, Left Door}} | ||
{{Table-AddRow}} | {{Table-AddRow}} | ||
{{Table-ImageCell|StoneRoundedDoorOfset.png|Round Wall, Left Entrance}} | |||
{{Table-ImageCell|No.png|Round Wall, Right Door}} | {{Table-ImageCell|No.png|Round Wall, Right Door}} | ||
{{Table-ImageCell| | {{Table-ImageCell|RoundWallRightDoor.png|Round Wall, Right Entrance}} | ||
{{Table-ImageCell| | {{Table-AddRow}} | ||
{{Table-ImageCell|PalisadeSlopeTopBattlement.png|Sloped Palisade Battlement, Left}} | |||
{{Table-ImageCell|PalisadeSlopeMirTopBattlement.png|Sloped Palisade Battlement, Right}} | |||
{{Table-ImageCell|PalisadeSlopeMirTop.png|Sloped Palisade With Spikes, Left}} | |||
{{Table-AddRow}} | {{Table-AddRow}} | ||
{{Table-ImageCell| | {{Table-ImageCell|PalisadeSlopeTop.png|Sloped Palisade With Spikes, Right}} | ||
{{Table-ImageCell| | {{Table-ImageCell|PalisadeSlope.png|Sloped Palisade, Right}} | ||
{{Table-ImageCell| | {{Table-ImageCell|PalisadeSlopeMir.png|Sloped Palisade, Left}} | ||
{{Table-AddRow}} | {{Table-AddRow}} | ||
{{Table-ImageCell| | {{Table-ImageCell|Wood90Support.png|Sloped Wooden Support}} | ||
{{Table-ImageCell|No.png|Small Arch}} | {{Table-ImageCell|No.png|Small Arch}} | ||
{{Table-ImageCell| | {{Table-ImageCell|StoneBattlementRoundSmall.png|Small Round Battlement}} | ||
{{Table-AddRow}} | {{Table-AddRow}} | ||
{{Table-ImageCell|StoneRoundedFull.png|Small Round Corner}} | {{Table-ImageCell|StoneRoundedFull.png|Small Round Corner}} | ||
{{Table-ImageCell| | {{Table-ImageCell|SmallRoundLedgeBattlement.png|Small Round Ledge Battlement}} | ||
{{Table-ImageCell| | {{Table-ImageCell|SmallRoundLedgePlatform.png|Small Round Ledge Platform}} | ||
{{Table-AddRow}} | {{Table-AddRow}} | ||
{{Table-ImageCell|StoneRoundedWall.png|Small Round Wall}} | {{Table-ImageCell|StoneRoundedWall.png|Small Round Wall}} | ||
| Line 132: | Line 136: | ||
{{Table-ImageCell|SmallSlope.png|Small Slope}} | {{Table-ImageCell|SmallSlope.png|Small Slope}} | ||
{{Table-AddRow}} | {{Table-AddRow}} | ||
{{Table-ImageCell| | {{Table-ImageCell|WalkWayStairs.png|Small Stairs, Left}} | ||
{{Table-ImageCell| | {{Table-ImageCell|WalkWayStairsMir.png|Small Stairs, Right}} | ||
{{Table-ImageCell|StonePillarSquare.png|Square Pillar}} | {{Table-ImageCell|StonePillarSquare.png|Square Pillar}} | ||
{{Table-AddRow}} | {{Table-AddRow}} | ||
{{Table-ImageCell| | {{Table-ImageCell|StairsLeftSpiral.png|Stairs, Left Spiral}} | ||
{{Table-ImageCell| | {{Table-ImageCell|SpiralStairs.png|Stairs, Right Spiral}} | ||
{{Table-ImageCell|StoneStairsSimple.png|Stairs}} | {{Table-ImageCell|StoneStairsSimple.png|Stairs}} | ||
{{Table-AddRow}} | {{Table-AddRow}} | ||
{{Table-ImageCell| | {{Table-ImageCell|StickFence.png|Stick Fence}} | ||
{{Table-ImageCell|StoneCube.png|Stone Cube}} | {{Table-ImageCell|StoneCube.png|Stone Cube}} | ||
{{Table-ImageCell| | {{Table-ImageCell|RoofTileCornerRoundTall.png|Tall Round Tile Roof}} | ||
{{Table-AddRow}} | {{Table-AddRow}} | ||
{{Table-ImageCell|No.png|Thatch Roof Inner Corner}} | {{Table-ImageCell|No.png|Thatch Roof Inner Corner}} | ||
| Line 149: | Line 153: | ||
{{Table-AddRow}} | {{Table-AddRow}} | ||
{{Table-ImageCell|No.png|Thatch Roof}} | {{Table-ImageCell|No.png|Thatch Roof}} | ||
{{Table-ImageCell| | {{Table-ImageCell|RoofTileInvCorner.png|Tile Roof Inner Corner}} | ||
{{Table-ImageCell| | {{Table-ImageCell|RoofTileCorner.png|Tile Roof Outer Corner}} | ||
{{Table-AddRow}} | {{Table-AddRow}} | ||
{{Table-ImageCell| | {{Table-ImageCell|RoofTileOddCross.png|Tile Roof Top + Section}} | ||
{{Table-ImageCell| | {{Table-ImageCell|RoofTileOddTurn.png|Tile Roof Top Corner}} | ||
{{Table-ImageCell| | {{Table-ImageCell|RoofTileOddCut.png|Tile Roof Top End}} | ||
{{Table-AddRow}} | {{Table-AddRow}} | ||
{{Table-ImageCell| | {{Table-ImageCell|RoofTileOddEnd.png|Tile Roof Top Peak}} | ||
{{Table-ImageCell| | {{Table-ImageCell|RoofTileOddTop.png|Tile Roof Top Section}} | ||
{{Table-ImageCell| | {{Table-ImageCell|RoofTileOddT.png|Tile Roof Top T Section}} | ||
{{Table-AddRow}} | {{Table-AddRow}} | ||
{{Table-ImageCell| | {{Table-ImageCell|BasicRoof.png|Tile Roof}} | ||
{{Table-ImageCell|StoneWallArchHalf.png|Wall Arch, Left}} | {{Table-ImageCell|StoneWallArchHalf.png|Wall Arch, Left}} | ||
{{Table-ImageCell|WallArchRight.png|Wall Arch, Right}} | {{Table-ImageCell|WallArchRight.png|Wall Arch, Right}} | ||
| Line 168: | Line 172: | ||
{{Table-ImageCell|HouseHalfStoneTriangleOdd.png|Wall Top}} | {{Table-ImageCell|HouseHalfStoneTriangleOdd.png|Wall Top}} | ||
{{Table-AddRow}} | {{Table-AddRow}} | ||
{{Table-ImageCell| | {{Table-ImageCell|StoneArchFullWall.png|Wall With Arch}} | ||
{{Table-ImageCell|StoneWallRoundDoor.png|Wall With Door}} | {{Table-ImageCell|StoneWallRoundDoor.png|Wall With Door}} | ||
{{Table-ImageCell|StoneDoor.png|Wall With Entrance}} | {{Table-ImageCell|StoneDoor.png|Wall With Entrance}} | ||
{{Table-AddRow}} | {{Table-AddRow}} | ||
{{Table-ImageCell|No.png|Wall With Shutters}} | {{Table-ImageCell|No.png|Wall With Shutters}} | ||
{{Table-ImageCell| | {{Table-ImageCell|StoneWindow.png|Wall With Window}} | ||
{{Table-ImageCell| | {{Table-ImageCell|WalkWayAngleInv.png|Wall-Walk Corner}} | ||
{{Table-AddRow}} | {{Table-AddRow}} | ||
{{Table-ImageCell| | {{Table-ImageCell|WalkWayDiagonalAngle.png|Wall-Walk Diagonal Corner}} | ||
{{Table-ImageCell| | {{Table-ImageCell|WalkWayDiagonal.png|Wall-Walk Diagonal}} | ||
{{Table-ImageCell| | {{Table-ImageCell|WalkWayAngle.png|Wall-Walk Turn}} | ||
{{Table-AddRow}} | {{Table-AddRow}} | ||
{{Table-ImageCell| | {{Table-ImageCell|WalkWayStraight.png|Wall-Walk}} | ||
{{Table-ImageCell|StoneWall.png|Wall}} | {{Table-ImageCell|StoneWall.png|Wall}} | ||
{{Table-ImageCell| | {{Table-ImageCell|Drawbridge.png|Wooden Drawbridge}} | ||
{{Table-AddRow}} | {{Table-AddRow}} | ||
{{Table-ImageCell|WoodenGate.png|Wooden Gate}} | {{Table-ImageCell|WoodenGate.png|Wooden Gate}} | ||
{{Table-ImageCell| | {{Table-ImageCell|Portcullis.png|Wooden Portcullis}} | ||
{{Table-ImageCell| | {{Table-ImageCell|WoodenRoofInnerCorner.png|Wooden Roof Inner Corner}} | ||
{{Table-AddRow}} | {{Table-AddRow}} | ||
{{Table-ImageCell| | {{Table-ImageCell|WoodenRoofOuterCorner.png|Wooden Roof Outer Corner}} | ||
{{Table-ImageCell| | {{Table-ImageCell|RoofWoodTop.png|Wooden Roof Top Section}} | ||
{{Table-ImageCell| | {{Table-ImageCell|BasicWood.png|Wooden Roof}} | ||
{{Table-AddRow}} | {{Table-AddRow}} | ||
{{Table-ImageCell| | {{Table-ImageCell|BlankTower.png|Wooden Support}} | ||
{{Table-ImageCell| | {{Table-ImageCell|House_Half_Timber_Triangle.png|Wooden Wall Slope}} | ||
{{Table-ImageCell| | {{Table-ImageCell|HouseTimberTriangleOdd.png|Wooden Wall Top}} | ||
{{Table-AddRow}} | {{Table-AddRow}} | ||
{{Table-ImageCell| | {{Table-ImageCell|PlankDoor.png|Wooden Wall With Door}} | ||
{{Table-ImageCell| | {{Table-ImageCell|House_Half_Timber_Door.png|Wooden Wall With Entrance}} | ||
{{Table-ImageCell| | {{Table-ImageCell|PlankShutter.png|Wooden Wall With Shutter}} | ||
{{Table-AddRow}} | {{Table-AddRow}} | ||
{{Table-ImageCell| | {{Table-ImageCell|House_Half_Timber_Window.png|Wooden Wall With Window}} | ||
{{Table-ImageCell| | {{Table-ImageCell|House_Half_Timber_Wall.png|Wooden Wall}} | ||
{{Table-End}} | {{Table-End}} | ||
Large Round Wall, Right Entrance Offset missing!! | Large Round Wall, Right Entrance Offset missing!! | ||
Revision as of 13:39, 8 March 2017

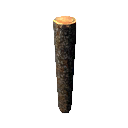
Wooden Sticks is an early-game component used in most of Medieval Engineers crafting recipes. It can be crafted in the player's crafting screen using 1 Log or collected directly from small trees spread around the planet.
Resource
- Used to Craft
- Used to Build
None
Crafting Recipe
Crafted By (Any)
Player
Required Items
Amount Produced
1 item
Inventory Item
- Mass
6.7 kg kg
- Stack Size
15 item(s)